In our last raised bed garden, we experimented with a DIY Soaker Hose Irrigation system that turned out quite well. It helped us to prepare for this installation, at the new house, which is smarter and more visually appealing.
Benefits of a Soaker Hose Irrigation System
But first…why bother?
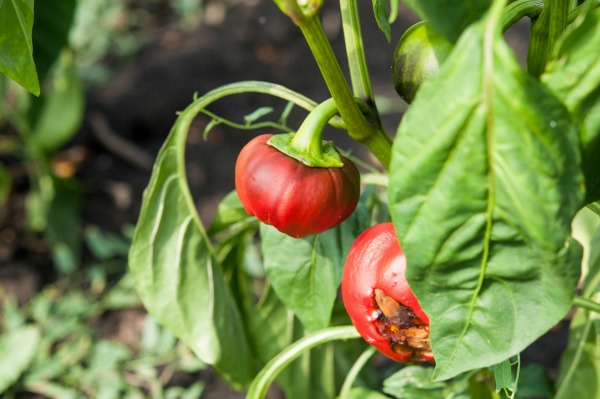
If you are giving your garden a quick, shallow watering once or twice a day, you may be putting your plants under stress– especially if you live in the southeast or midwest where days are long and hot. When your plants get hot and the soil gets dry, the leaves will begin to wilt. Even a little wilting is a sign of stress. Over time, that will damage the health of your plants. You will notice slower plant growth and fewer, smaller fruits.
When set on a timer, soaker hoses provide a steady flow of water for predetermined periods of time. This ensures that your plants get the right amount of moisture. No wilting means no stress, which leads to healthier plants and a more bountiful harvest.
Secondly, top-down watering techniques– like spraying with a water hose or sprinkler system– causes the leaves to get wet. In hot temperatures, you’re basically steaming your plants! If the nights are also warm, the damp leaves form a home for all sorts of rot, viruses, fungus and mold. If the weather is cool while the vegetable plants are wet, they can become wilted and weak. By keeping the water on the ground where it is needed, you minimize those risks.
…and those are some of the reasons why we opted for a drip irrigation system.
Connecting the Soaker Hose to the Source
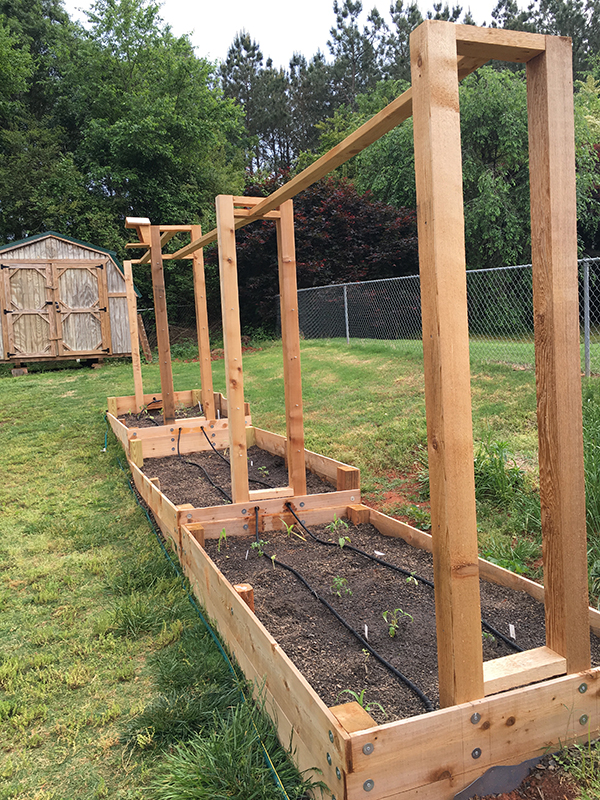
The spout on the house is far from the raised garden beds. Alejandro determined it was best to use about 75′ of standard garden hose as the main connection. We ran the green garden hose up the incline in our backyard towards the raised beds (seen at the left, bottom edge of the raised bed). Then we attached the garden hose to the soaker hose at the top of the hill using a hose mender. This way, the more constrained flow of water is downward through the soaker hose, hopefully improving water pressure.
Got leaks? When we noticed leaks between the mender kit and the hose, we used plumbers tape or “thread seal tape” to fill the gaps and stop leaks. You may also need to tighten the brackets on the hose mender to minimize leakage.
Setting Up the Soaker Hose Irrigation System
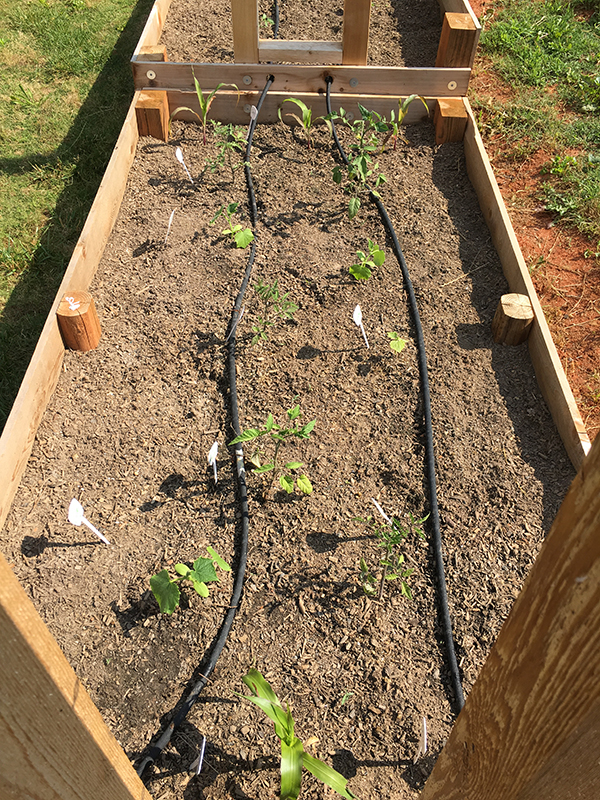
We began with the measurements of our garden beds and drew out our irrigation plan on paper. Since we have two rows per bed, we cut two lengths of soaker hose for each row rather than one hose down the middle. I used Fiskar scissors for cutting since the material is easy to work with.
We laid out the hose segments to make sure that they were the right lengths before proceeding. Check!
Most of the 4′ x 8′ raised beds are flush with other 4′ x 8′ beds. We didn’t want the hose to drape over the edges of the boxes, but rather to go through the wood. We thought it looked nicer that way. I used a 1/8 bi-metal hole saw, which penetrated the cedar boards quickly and easily. On the terminating end, we ran the garden hose through. Between raised beds that touched one another, we let the soaker hose continue uninterrupted.

We attached the appropriate adapters to the soaker hose. No special materials are necessary! The soaker hose slides into the adapters:
- Males and females make the connections between hoses and connectors possible.
- T- and Y- shaped adapters divert the direction of the hose and water flow.
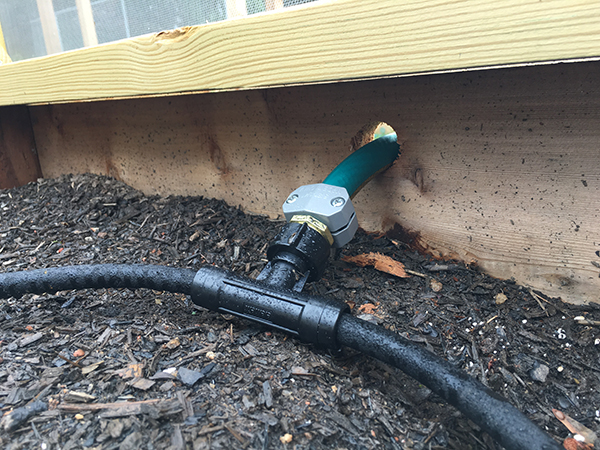
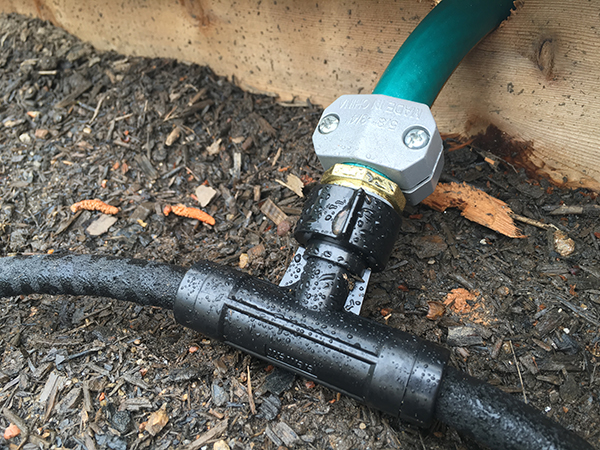
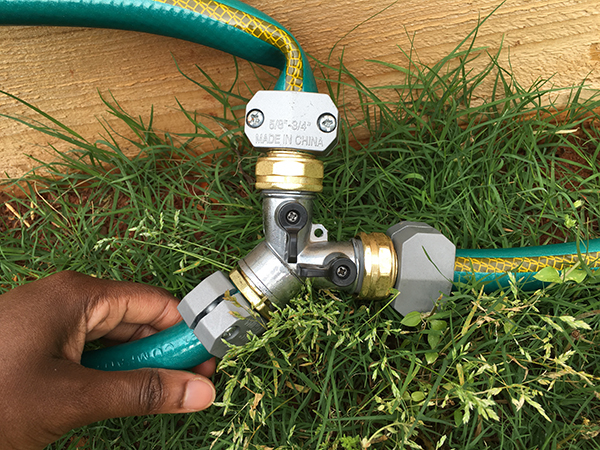
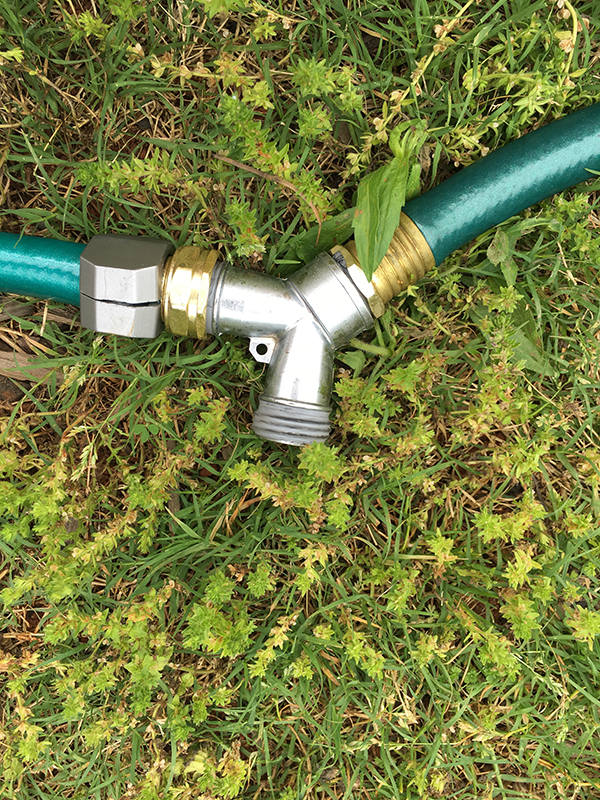
- There are small Ys that we used to divert water between beds and one big, Y-shaped full-flow valve design for the spout near the house.
- There are also terminator caps for the end of each hose.
Male tip on garden hose and female tip on soaker hose
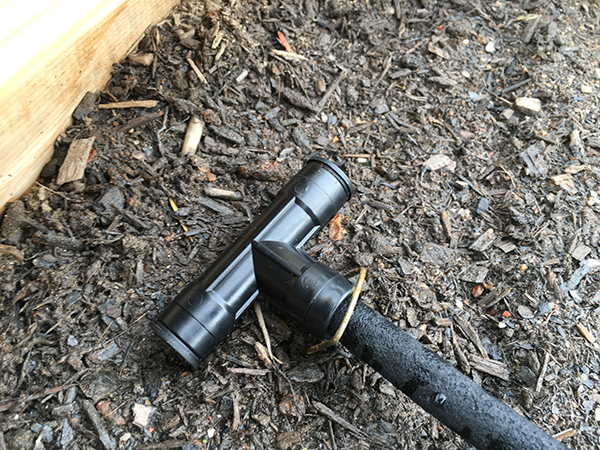
T adapter, also featured above on soaker hose
Small Y Adapter
Large, full-flow Y adapter
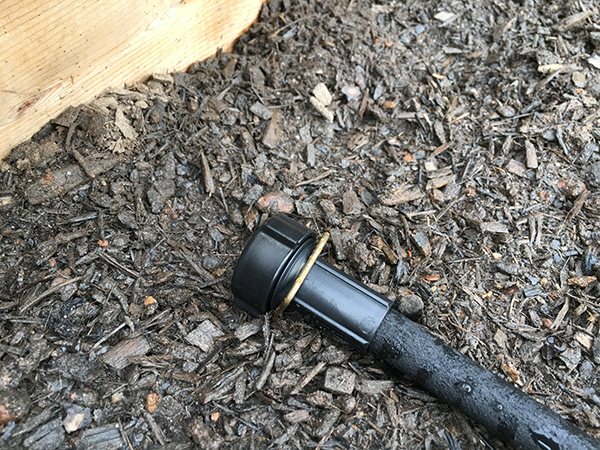
Terminating cap at end of soaker hose
We secured the soaker hose in place using garden staples. This is helpful since I planted the seedlings at night during a garden emergency and I didn’t line them up evenly. Instead of perfect rows, the soaker hose meanders where needed.
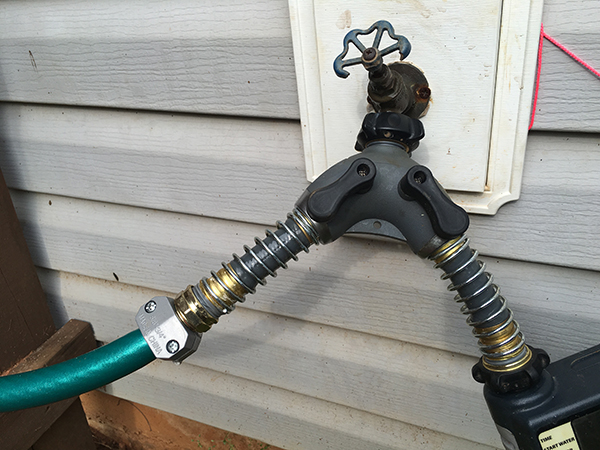
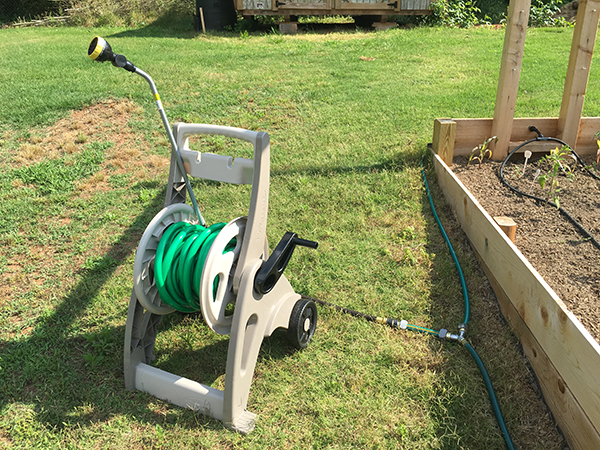
Since the spout is so far from the house, Alejandro had the great idea to use open-ended Y adapters with shut off valves in two places in the garden. This allows me to have an additional garden hose on a mobile caddy that I can use for water on demand.
Lastly, we attached our timers to the main spout near the house. Then we turned on the system and…oops!
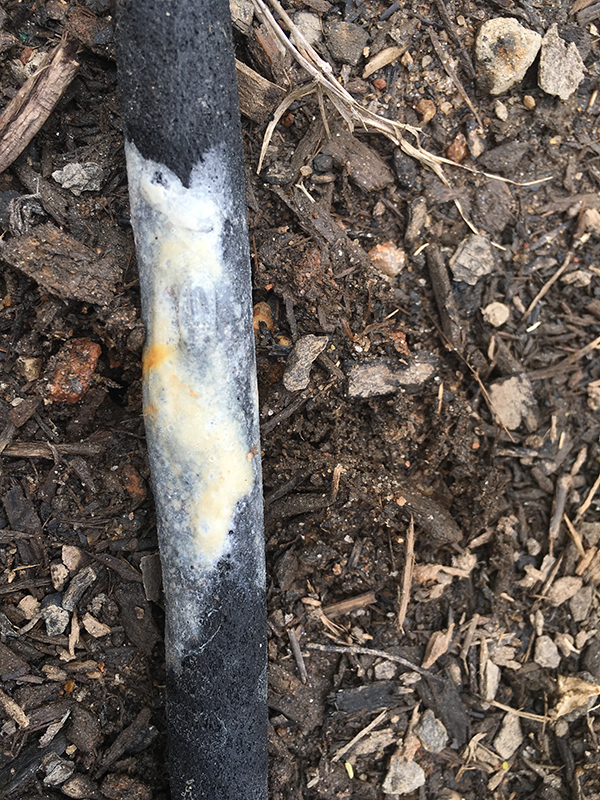
At some point, we got a tear in the soaker hose. Water spewed from the hole, nearly drowning one of the small plants in a matter of seconds. We turned off the system and waited for the hose to dry. Then Alejandro applied a few layers of rubber cement to the soaker hose. It’s ugly but it stopped the leak!
Costs and Savings
In the last garden, we purchased everything that we needed separately. This year, we started with the Element SoakerPRO 3/8 in. Diameter x 100 ft. System Water Hose soaker hose irrigation kit from Home Deport for $25. We added a few more pieces of hardware as needed, each being about $4 each. Our total cost for the irrigation system was about $40.
The garden hose caddy cost $30 and the garden hose (I think 25′ ) was $25. So that little system was $55.
In the last garden, installing a soaker hose irrigation system saved both money and time. We cut our water bill by about 10%. We haven’t made it through enough billing cycles to calculate the precise savings of this system yet. I will update this post around July 2016 with this information.
What I can say is that I gained an hour of my life back each day! To give a garden this size a good, deep soil drenching (enough to prevent midday wilting) I dedicated about 30 min in the morning and 30 minutes in the late afternoon to manually watering the garden. I don’t have to stand there and water the garden twice a day. Lovely!
If you have a drip irrigation or soaker hose system, do you also use rubber mulch, plastic mulch, or any other soil covering? I’m interested to see how that improves the efficiency of the garden. I also wonder if there are any disadvantages (difficult to fertilize, mold, etc.) Let me know!